
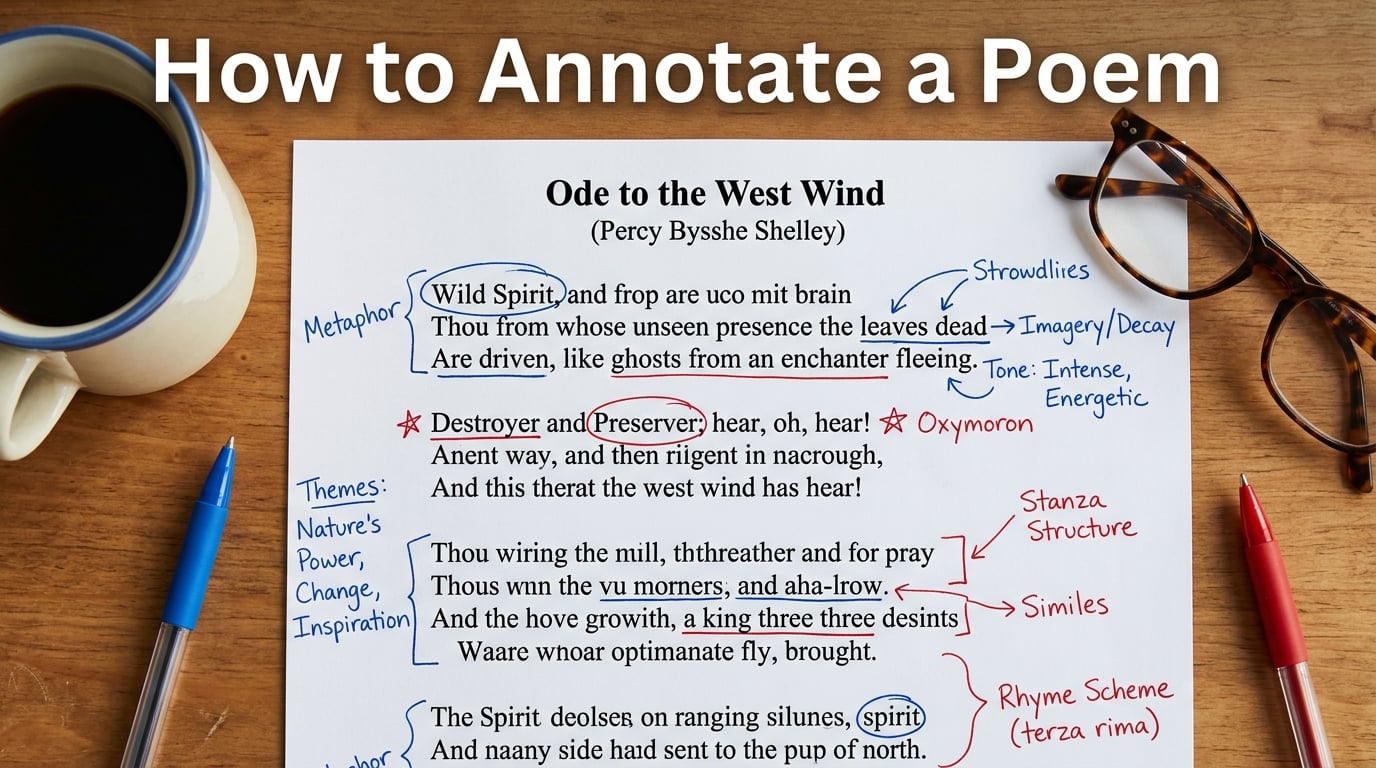
Learning how to annotate a poem transformed the way I read poetry. Before I understood the process, poems felt like locked boxes. After I learned what English teachers actually do when they mark up a text, everything opened up. The lines started making sense, the themes surfaced on their own, and I could finally write about poetry without staring at a blank page.
This guide walks you through the exact annotation method that English teachers use. You will learn the step-by-step process, the specific marks to use, common mistakes to avoid, and how to turn your annotations into a strong essay. Whether you are a student prepping for a literature exam or someone who just wants to understand poetry on a deeper level, this method works.
I have broken everything down into seven clear steps. I have also included a quick five-minute version, a real annotation example with visible marks, and answers to the most common questions students ask about poem annotation.
Table of Contents
What Does It Mean to Annotate a Poem?
Annotating a poem means marking up the text with notes, symbols, and questions as you read. You underline key words, circle literary devices, write observations in the margins, and track your thinking on the page itself. The goal is not to decorate the poem. The goal is to create a visible record of your thought process.
Think of annotation as having a conversation with the poem. Every mark you make is a response to something the poet wrote. When you finish, your annotated copy should tell the story of how you understood the piece, from your first confused reading to your final interpretation.
Poem annotation is different from annotating prose because every single word in a poem carries more weight. Poets compress meaning into fewer words, so each line deserves closer attention than a typical paragraph in a novel.
Why English Teachers Annotate Poems
English teachers annotate because reading a poem once is never enough. Poetry is dense by design. The first reading gives you an impression. The second reading reveals patterns. The third reading connects those patterns to a deeper meaning. Annotation forces you to slow down and go through all three layers.
Many students see annotation as busywork. I understand that feeling. When I first encountered annotation in school, I circled random words just to show the teacher I had done something. But teachers annotate because the process actually changes how your brain engages with text. You stop being a passive reader and start being an active investigator.
The teachers I have talked with on education forums all say the same thing. Annotation works best when you do it for yourself, not for a grade. When you annotate to understand, the marks become a tool. When you annotate to please a teacher, the marks become a chore. This guide helps you use annotation as a tool.
Annotation Marks Guide: What Symbols to Use
One of the biggest content gaps I found when researching this topic was that almost no resource tells you what marks to actually put on the page. Here is a simple system you can use:
- Underline key words or phrases that stand out or carry emotional weight
- Circle literary devices like metaphors, similes, and personification
- Box repeating words or patterns you notice across multiple lines
- Highlight or star lines that seem especially important to the poem’s central message
- Draw arrows to connect related ideas, images, or words across different stanzas
- Question mark (?): write this next to anything confusing or unclear
- Exclamation point (!): mark moments that surprise you or create a shift
- Write notes in the margins for your thoughts, reactions, and interpretations
You do not need to use every mark on every poem. Pick the ones that feel natural and adjust your system over time. There is no single correct way to annotate.
How to Annotate a Poem: 7 Steps
Here is the core process. Follow these steps in order, and you will have a fully annotated poem by the end. I recommend going through the entire process at least three times on the same poem before you feel satisfied with your work.
Step 1: Read the Poem Without Annotating
Read the poem all the way through without touching your pen. Let yourself experience it as a whole piece before you start dissecting it. This first reading gives you the overall feeling and flow of the poem.
Now read it a second time out loud. Poetry was meant to be heard. You will catch rhythm changes, sound patterns, and emotional shifts that you miss when reading silently. Pay attention to where your voice naturally pauses or speeds up.
Step 2: Clarify Vocabulary and Unfamiliar References
Go through line by line and circle any word you do not know. Look up the definition and write a brief note in the margin. This step matters more than students think. A single misunderstood word can throw off your entire interpretation of a poem.
Also mark any proper nouns, historical references, or allusions. Poets often reference mythology, religion, history, or other literary works. If you do not recognize a reference, look it up. Write a short note explaining the connection.
Write a quick paraphrase of each stanza in the margin after you clarify the vocabulary. Putting the poem into your own words confirms that you actually understand what is happening on a literal level before you search for deeper meaning.
Step 3: Mark the Structure and Form
Identify the poem’s structure. Count the stanzas. Note the line count per stanza. Look for a consistent rhyme scheme by labeling the end sounds with letters (A, B, A, B for alternating rhymes, for example). Write the rhyme scheme in the margin next to each stanza.
Check the meter if you can. Tap out the rhythm with your finger as you read. You do not need to identify the exact metrical name, but notice whether the rhythm is regular or irregular. Irregular rhythm often signals emotional intensity or a shift in the poem’s tone.
Note any enjambment, which is when a line runs into the next without punctuation. Enjambment creates momentum and can change the meaning of a sentence based on where the line breaks. Mark these with a small arrow at the end of the line.
Step 4: Identify Figurative Language and Literary Devices
This is the step most students jump to first, but it works best after you understand the literal meaning. Now go through and circle every literary device you can find. Look for these common ones:
- Simile (comparisons using like or as)
- Metaphor (direct comparisons without like or as)
- Personification (giving human qualities to non-human things)
- Imagery (descriptive language that appeals to the senses)
- Symbolism (objects or images that represent larger ideas)
- Alliteration (repeated consonant sounds at the start of words)
- Hyperbole (deliberate exaggeration)
- Allusion (references to other texts, people, or events)
- Onomatopoeia (words that imitate sounds)
- Oxymoron (contradictory terms placed together)
Write the name of each device next to where you circle it. But here is the part that separates English teacher annotation from student annotation. Do not just label the device. Write one sentence explaining what the device does. What effect does it create? Why did the poet choose it? A metaphor labeled without explanation is just decoration.
Step 5: Note Tone, Mood, and Shifts
Tone is the speaker’s attitude toward the subject. Mood is the emotional atmosphere the poem creates for the reader. These are different things, and identifying both helps you understand the poem on a deeper level.
Write one or two tone words in the margin of each stanza. Words like bitter, nostalgic, defiant, playful, mournful, or sarcastic work well. Track whether the tone shifts as the poem progresses. Many poems have a turn, or volta, where the tone or perspective changes. Mark that shift clearly with a line or an arrow.
The shift is often the most important moment in the poem. It usually reveals the central insight. Common places for shifts include the start of a new stanza, a word like “but” or “yet,” or a change in rhyme scheme.
Step 6: Determine the Theme and Central Meaning
Now synthesize everything you have found. What is the poem really about? Not just the surface topic, but the deeper message. The theme is the universal idea the poem explores.
Look at the literary devices you circled, the tone words you noted, and the structural choices you marked. How do they all work together? Write your theme statement at the bottom of the page or in the largest margin space you have.
A strong theme statement is not just one word. “Love” is a topic, not a theme. A theme statement would be something like “love is fragile and can be destroyed by pride.” That gives you something specific to write about in an essay.
Step 7: Write Your Personal Response
Finally, write a few sentences about your own reaction to the poem. Did it move you? Did it remind you of something? Did you disagree with the speaker? This step makes the poem yours.
Personal response also helps you remember the poem later. When you connect a poem to your own experience, it sticks. Teachers encourage this step because it transforms annotation from an academic exercise into genuine engagement with literature.
Reread the poem one final time with all your annotations in place. You will likely notice new things now that your earlier notes have primed your brain. Add any final thoughts that come to you.
Annotation Example With Visible Marks
Here is a short example to show what annotated poetry looks like in practice. I am using a fragment in the style of a nature poem with annotation marks applied:
The [BOX: dark] forest [CIRCLE: personification] whispered secrets to the wind,
[UNDERLINE: silver] leaves [ARROW to “whispered”] trembling under [STAR] moonlight.
[?: Who is listening?] No one walks this path but me, [!: shift in tone]
and I am [CIRCLE: metaphor] a shadow [NOTE: speaker becomes part of the landscape] among the trees.
Notice how each mark does something specific. The boxed word highlights a mood-setting adjective. The circle flags a literary device. The arrow connects an image to an earlier action. The question mark notes genuine confusion worth exploring. The exclamation point marks a tonal shift. The margin note explains what a metaphor accomplishes rather than just naming it.
Common Mistakes to Avoid When Annotating a Poem
No competitor resource covers these mistakes, but they come up constantly in classroom settings. I have seen these errors derail student annotations over and over. Avoid them and your annotation quality will jump immediately.
1. Labeling devices without explaining their effect. Writing “metaphor” next to a line tells you nothing useful. Always add a note about what the metaphor does and why it matters. The device is the tool. The effect is the point.
2. Annotating on the first read. If you start marking things up before you understand the poem, you will highlight the wrong elements. Always read through once or twice cleanly before you pick up your pen.
3. Highlighting everything. If half the page is highlighted, nothing stands out. Be selective. Choose the words and lines that carry the most weight.
4. Ignoring the title. The title often contains clues about theme, tone, or form. Many students skip right past it. Read the title carefully and write a note about what it signals before you start on the poem itself.
5. Treating annotation as decoration. Random circles and underlines that serve no purpose just clutter the page. Every mark should record a specific thought or observation.
6. Skipping the paraphrase step. If you cannot put the poem into your own words, you do not understand it yet. Device hunting without comprehension leads to shallow analysis.
7. Forgetting to look for shifts. The turn in a poem is where the meaning deepens. Students who miss the shift miss the poem’s most important moment.
How to Turn Annotations Into an Essay
This is another topic no competitor covers, but it is the reason most students annotate in the first place. Your annotated poem is essentially a pre-written essay outline if you use it correctly.
Start with your theme statement from Step 6. That becomes your thesis. Now look back at your circled literary devices. Each one with a solid margin note becomes a body paragraph. The structure of your essay mirrors the work you already did on the page.
For each body paragraph, quote the line you annotated, name the device, and then use the note you wrote in the margin as the starting point for your analysis. Your margin notes already contain the thinking. You just need to expand them into full sentences.
Use the tone and shift observations to structure your argument. If the poem shifts halfway through, your essay can follow that same movement. Discuss what happens before the shift, then explore how the shift changes the meaning.
Finally, your personal response from Step 7 can inform your conclusion. A strong essay ending connects the poem’s theme to a broader context, and your own reaction to the poem is a natural bridge to that kind of closing.
How to Annotate a Poem in 5 Minutes
Sometimes you need a fast version. Here is a condensed annotation method you can complete in about five minutes on a short poem:
- Minute 1: Read the poem twice, once silently and once out loud
- Minute 2: Circle unfamiliar words and look them up quickly
- Minute 3: Underline three to five key phrases that stand out
- Minute 4: Mark two or three literary devices and write one note each
- Minute 5: Write a one-sentence theme statement at the bottom
This quick method will not replace a full annotation session, but it gives you enough to participate in a class discussion or write a short response. The five-minute version works best for shorter poems of one page or less.
Digital Annotation Tools for Poems
If you prefer working on a screen, several digital tools make poem annotation straightforward. Google Docs lets you use the commenting feature to add margin notes alongside any highlighted text. Kami and Hypothesis both let you annotate PDFs, which works well if your teacher assigns poems as downloadable files.
For a more visual approach, Notion and GoodNotes support handwritten annotation on tablets. You can circle, underline, and draw arrows just like you would on paper. The advantage of digital annotation is that you can edit, rearrange, and search your notes later without messy cross-outs.
Whatever tool you use, the process stays the same. The marks are just a medium. The thinking behind them is what matters.
FAQs
How to properly annotate a poem?
To properly annotate a poem, read it at least twice before marking anything. Then work through seven steps: clarify vocabulary, paraphrase each stanza, mark the structure and rhyme scheme, identify literary devices and explain their effects, note tone and shifts, determine the theme, and write a personal response. Use consistent marks like underlining for key words, circling for devices, and arrows for connections.
What are the 5 steps of annotation?
The five core steps of annotation are: 1) Read the poem twice without annotating, 2) Clarify vocabulary and write brief paraphrases, 3) Mark literary devices and explain their effects, 4) Note tone, mood, and shifts, and 5) Determine the theme and write your personal response. These five steps give you a solid annotation even if you skip the detailed structure analysis.
What are the 7 steps to analyzing a poem?
The seven steps to analyzing a poem are: read without annotating, clarify vocabulary and references, mark structure and form, identify figurative language and literary devices, note tone and mood and shifts, determine the central theme, and write a personal response. This process moves from surface comprehension to deep interpretation.
How do I annotate a poem in 5 minutes?
To annotate a poem in five minutes, spend one minute reading it twice, one minute looking up unfamiliar words, one minute underlining key phrases, one minute marking two or three literary devices, and one minute writing a one-sentence theme statement. This quick method works best for short poems of one page or less.
What is a good way to annotate a poem?
A good way to annotate a poem is to use a consistent system of marks such as underlining for key words, circling for literary devices, boxing for patterns, and writing brief margin notes for your interpretations. The most effective annotation always explains why a device matters rather than just labeling it.
Conclusion
Learning how to annotate a poem is really about learning how to read actively. The marks on the page are just a visible record of your thinking. When you follow the seven-step process, read the poem multiple times, clarify vocabulary, analyze structure, identify literary devices with explanations, track tone and shifts, determine theme, and write your response, you engage with poetry the way English teachers do.
Remember that annotation is a personal tool, not a performance. Use the marks that make sense to you. Avoid the common mistakes, especially labeling devices without explaining their effect. And when it is time to write an essay, your annotations already contain everything you need.
Start with a short poem you enjoy. Grab a pen and work through the seven steps. The more you practice, the more natural the process becomes. Soon you will be annotating poetry like an English teacher without even thinking about it.